DIY Lean-To Shed: Simple Plans for Efficient Backyard Storage
This comprehensive guide provides detailed instructions and considerations for constructing a robust and efficient lean-to shed, a practical solution for maximizing backyard storage space. The design emphasizes simplicity, affordability, and the utilization of readily available materials, making it a feasible project for individuals with moderate DIY skills. Careful planning and execution are crucial to ensure the longevity and structural integrity of your new shed.
I. Planning and Design Considerations
Before embarking on construction, meticulous planning is paramount. This phase involves several key considerations that will directly impact the shed's functionality and aesthetic appeal.
A. Determining Size and Location
The dimensions of your lean-to shed should be carefully determined based on your storage needs and available space. Consider the types and quantities of items you intend to store. Accurate measurements are crucial for material procurement and construction accuracy. The location should also be carefully chosen, taking into account proximity to existing structures, access to utilities, and sunlight exposure. Optimal placement maximizes convenience and minimizes potential conflicts with other landscape features.
B. Material Selection
The choice of materials significantly impacts the shed's durability, cost, and aesthetic appeal. Pressure-treated lumber is highly recommended for its resistance to rot and insect infestation. For the roofing material, consider asphalt shingles for their affordability and ease of installation. Alternatively, corrugated metal roofing offers superior durability and weather resistance but may require more specialized tools and skills. The choice will depend on your budget and desired longevity. Ensure all materials are of sufficient quality to withstand anticipated weather conditions.
C. Foundation Considerations
The foundation is the cornerstone of any structure, and your lean-to shed is no exception. A simple concrete slab foundation provides excellent stability and longevity. However, a gravel base offers a more cost-effective and less labor-intensive alternative, particularly suitable for smaller sheds. Proper drainage around the foundation is crucial to prevent water damage and ensure the longevity of your shed. The chosen foundation should be level and adequately sized to support the shed's weight.
D. Building Codes and Permits
It is crucial to research and comply with local building codes and regulations before commencing construction. This may involve obtaining necessary permits, particularly for larger or more complex shed designs. Compliance with building codes ensures the safety and structural integrity of your project and avoids potential legal issues. Contact your local building department for specific requirements and guidance.
II. Construction Steps: A Detailed Guide
Once the planning phase is complete, the construction process can begin. The following steps outline a practical approach to building your lean-to shed.
A. Foundation Preparation
Begin by preparing the chosen site. This involves clearing the area of vegetation, leveling the ground, and excavating if necessary for a concrete slab or gravel base. If opting for a concrete foundation, construct a formwork and pour the concrete according to manufacturer instructions. For a gravel base, lay down a layer of gravel, compact it thoroughly, and add a layer of landscape fabric to prevent weed growth.
B. Framing the Structure
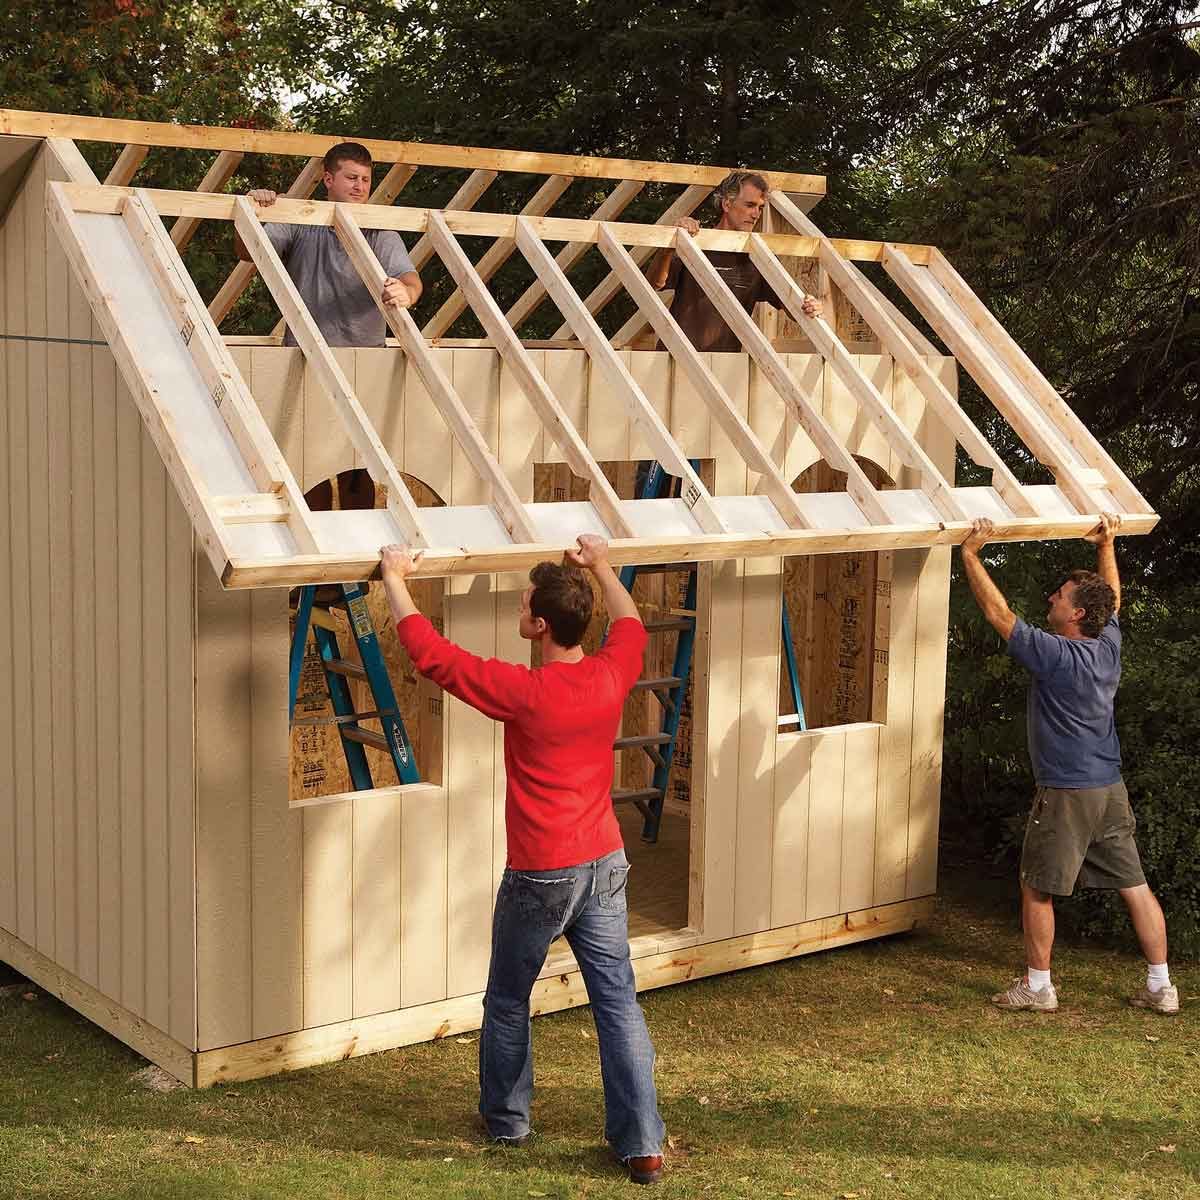
The framing forms the skeletal structure of your shed. This involves constructing the floor frame, wall frames, and roof frame. Use pressure-treated lumber for all framing members to ensure durability. Precise measurements and accurate cuts are essential for ensuring the structural integrity of the shed. Employ appropriate fastening techniques, such as using galvanized nails or screws, to secure the framing components.
C. Wall Construction
After framing, install the wall sheathing. This can be plywood or OSB (oriented strand board) for increased strength and stability. Ensure proper alignment and secure fastening. Consider adding insulation within the wall cavities to improve the shed's thermal performance and protect stored items from extreme temperatures.
D. Roofing Installation
Roofing installation requires careful attention to detail to ensure water tightness. Begin by installing the roof sheathing, typically plywood or OSB. Then, apply roofing felt or underlayment to provide an additional layer of protection against water penetration. Finally, install the chosen roofing material â€" asphalt shingles or corrugated metal â€" following the manufacturer's instructions.
E. Door and Window Installation
Install the door and any windows according to the chosen design. Ensure proper sealing and weather stripping to prevent drafts and water infiltration. Consider using strong hinges and a secure locking mechanism for the door. The placement and size of doors and windows should be carefully planned to optimize access and natural light within the shed.
F. Finishing Touches
Once the main structure is complete, add finishing touches to enhance the shed's appearance and functionality. This might involve painting or staining the exterior, adding trim, and installing shelves or other interior storage solutions. Consider adding ventilation to prevent moisture buildup inside the shed. Proper finishing touches significantly improve the overall aesthetic appeal and functionality.
III. Safety Precautions
Safety should be a paramount concern throughout the entire construction process. Observe the following safety precautions:
- Wear appropriate safety gear, including safety glasses, work gloves, and sturdy footwear.
- Use caution when operating power tools and follow manufacturer instructions carefully.
- Ensure proper ventilation when working with paints, stains, and other potentially hazardous materials.
- Maintain a clean and organized workspace to prevent accidents.
- Seek assistance when lifting heavy objects to avoid injury.
IV. Cost-Effectiveness and Material Optimization
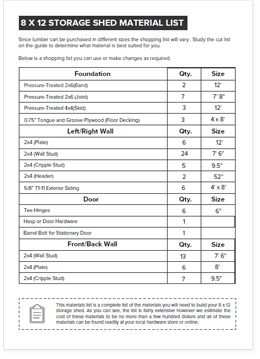
Building a lean-to shed can be a cost-effective way to increase storage capacity. Optimizing material usage and sourcing materials from budget-friendly suppliers can significantly reduce project expenses. Careful planning and efficient material handling minimize waste and maximize cost savings. Consider repurposing salvaged materials whenever possible, further reducing the overall cost of the project. Accurate calculations of required materials prevent unnecessary purchases and contribute to cost-effectiveness.
By following these detailed steps and safety precautions, you can successfully construct a durable and functional lean-to shed, significantly enhancing your backyard storage and adding value to your property. Remember that proper planning and attention to detail are key to a successful DIY project.


