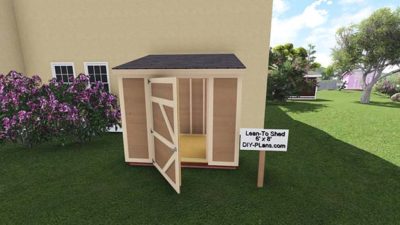
Tuesday, November 19, 2024

Build a Reliable 6x8 Firewood Shed with These Practical Plans

Build a Reliable 6x8 Firewood Shed with These Practical Plans

Building Your Dream 6x8 Firewood Shed: A Practical Guide

Hey there, fellow firewood enthusiasts! So, you're ready to build your own firewood shed? Awesome! A well-built shed not only keeps your wood dry and protected from the elements, but it also adds a touch of rustic charm to your property. This guide will walk you through building a reliable 6x8 firewood shed, step-by-step. We'll focus on practicality and durability, so you can enjoy your perfectly seasoned wood for years to come.

Planning Your Firewood Fortress: Location, Materials, and Design

Before you even grab a hammer, let's get the planning sorted. This phase is crucial for a smooth build.

Choosing the Perfect Spot

Consider these factors when selecting your shed's location:

  • Proximity to your house: Convenient access is key, especially on those chilly winter nights.
  • Level ground: A level base is essential for a stable structure. You might need to do some leveling before you begin.
  • Drainage: Make sure the area drains well to prevent water from accumulating around your shed.
  • Sun exposure: While some sun exposure helps with drying, excessive sun can lead to rapid drying and cracking. A location with some shade is ideal.
  • Access for delivery: Think about how you'll get the wood to the shed. Will you need a path or driveway?

Gathering Your Arsenal: Materials List

Here's a basic materials list. Quantities will vary depending on your specific design and local lumber prices. Always buy a little extra â€" it's better to have leftovers than to run short mid-project.

  • Pressure-treated lumber for the foundation (4x4s or 6x6s)
  • Untreated lumber for the walls and roof (2x4s or 2x6s)
  • Plywood or OSB for the sheathing
  • Roofing material (metal roofing is a durable choice)
  • Concrete blocks or a poured concrete slab for the foundation (optional, but recommended)
  • Nails, screws, and other fasteners
  • Exterior paint or stain (optional)
  • Building wrap or house wrap

Design Considerations: Open or Enclosed?

You can choose between an open-sided design for better airflow and faster drying, or an enclosed shed for maximum protection against rain and snow. An open-sided design usually requires less material and is easier to build. An enclosed shed will provide more protection but will involve more work. Consider your climate and how you like to store your firewood when deciding.

Construction: Building Your Firewood Haven

Let’s get our hands dirty! Remember, safety first. Wear appropriate safety gear including gloves, safety glasses, and sturdy work boots.

Foundation: Laying the Groundwork

A solid foundation is paramount. You have a few options:

  • Concrete Slab: The most durable option, but requires more work and materials.
  • Concrete Blocks: A good balance of durability and ease of construction.
  • Gravel Base: Simplest option, but less durable, especially in wet climates.

No matter which method you choose, ensure the base is level and large enough to support the shed.

Framing the Walls and Roof

This is where the construction really begins. Follow these steps:

  1. Build the wall frames: Cut and assemble the 2x4s or 2x6s to create the wall frames. Use appropriate fasteners to ensure strength and stability.
  2. Erect the walls: Carefully lift and secure the wall frames onto the foundation. Use corner brackets and bracing for added stability.
  3. Build the roof trusses (or rafters): This part can be tricky depending on the design, so carefully study your chosen plans. You may need to use additional supports for a strong and stable roof.
  4. Attach the roof trusses/rafters to the walls: Once again, use appropriate fasteners and bracing for a secure roof structure.

Sheathing and Roofing

Now it's time to add the exterior layers:

  • Attach sheathing: Nail the plywood or OSB sheathing to the wall and roof frames. Ensure proper overlap for a weathertight seal.
  • Install building wrap: This layer will provide an additional barrier against moisture.
  • Install roofing: This is the final exterior layer. Metal roofing is recommended for its durability and longevity.

Finishing Touches: Adding the Finishing Details

Almost there! Let’s put the finishing touches on your new firewood shed.

Doors and Ventilation

If you've opted for an enclosed shed, carefully install the door(s). Adequate ventilation is crucial for proper wood drying. Consider adding vents to the sides or roof to allow airflow.

Painting or Staining

To protect your shed from the elements and add some aesthetic appeal, consider painting or staining the exterior. Choose a high-quality exterior paint or stain designed to withstand the weather.

Frequently Asked Questions (FAQ)

Here are some common questions about building a firewood shed:

Q: How long does it take to build a 6x8 firewood shed?

A: This depends on your experience and the complexity of the design. A simple open-sided shed might take a weekend, while a more complex enclosed shed could take several weekends or longer.

Q: Do I need a building permit?

A: Check with your local building department. Building permits are often required for structures of a certain size.

Q: What kind of wood is best for the shed?

A: Pressure-treated lumber for the foundation is essential for rot resistance. For the walls and roof, you can use untreated lumber, but consider using cedar or redwood for their natural resistance to decay.

Q: Can I build this shed myself?

A: Absolutely! With careful planning, clear instructions, and a little DIY spirit, you can build a fantastic firewood shed yourself. However, if you’re not comfortable with construction, consider seeking help from a friend or hiring a professional.

Q: How much will it cost to build a 6x8 firewood shed?

A: The cost varies significantly based on material prices, your choice of materials, and whether you hire help. You can expect to spend anywhere from a few hundred to a thousand dollars or more.

There you have it! With a little planning and effort, you’ll soon be enjoying your own custom-built firewood shed. Happy building!
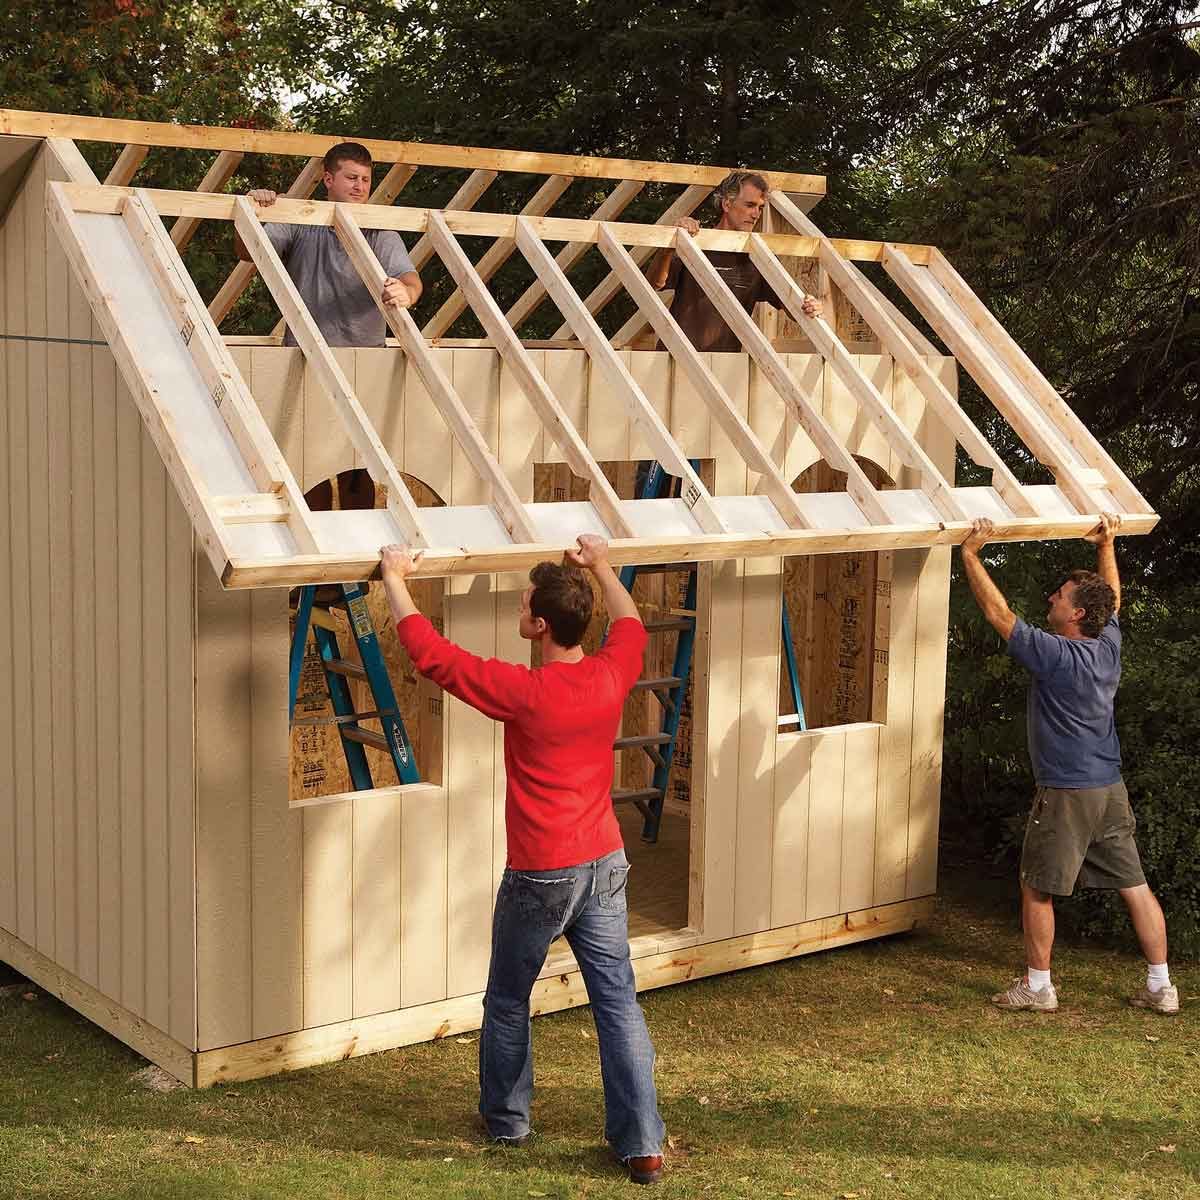
Read More..

How to Build a 6x8 Shed: DIY Plans for a Reliable Outdoor Shed

How to Build a 6x8 Shed: DIY Plans for a Reliable Outdoor Shed

How to Build a 6x8 Shed: DIY Plans for a Reliable Outdoor Shed

So, you're thinking about building your own shed? That's awesome! A 6x8 shed is a perfect size for a lot of projects â€" storing garden tools, bikes, or even setting up a small workshop. It’s manageable for a DIY project, but still gives you plenty of usable space. Let's dive into how you can build one yourself!

Planning Your 6x8 Shed Project

Before you even think about grabbing a hammer, a good plan is essential. This isn't just about throwing some wood together; we're building something sturdy and lasting. Here's what you need to consider:

Choosing Your Location

Where are you going to put this beauty? Consider:

  • Accessibility: Will you have easy access to bring in materials and later get your stuff in and out?
  • Sun exposure: Too much sun can fade materials and increase the heat inside. A bit of shade is ideal.
  • Drainage: Make sure the ground slopes away from the shed to avoid water buildup around the base.
  • Local regulations: Check with your local council or homeowners association about any building permits or restrictions.

Gathering Your Materials

This list isn't exhaustive, but it covers the essentials. Always buy a little extra â€" you'll inevitably need some for cuts or mistakes (we've all been there!).

  • Pressure-treated lumber: This is crucial for the base and framing, as it resists rot and insects. You’ll need 4x4 posts for the corners and supports, and 2x4s for the walls, roof, and framing.
  • Plywood or OSB sheathing: For the walls and roof.
  • Roofing material: Asphalt shingles are a popular and affordable option.
  • Siding: Choose something durable and weather-resistant.
  • Doors and windows: Consider the size and style you prefer â€" pre-hung doors and windows save a lot of time and hassle.
  • Fasteners: Plenty of screws, nails, and possibly some construction adhesive.
  • Concrete: For the foundation (or you could opt for a gravel base).
  • Tools: You’ll need a level, measuring tape, saw (circular saw recommended), drill, hammer, shovel, and various other hand tools.

Building the Foundation

A solid foundation is key! Here are two popular options:

Concrete Slab Foundation

This is the most durable option, but requires a bit more work. You'll need to excavate the area, pour a concrete slab, and let it cure completely before building on top. Ensure it's level!

Gravel Base Foundation

This is a simpler and quicker alternative. You'll need to level the ground, lay down a layer of gravel (a few inches thick), compact it, and then build your shed directly on top. While easier, it’s less durable and may not be suitable for all climates or soil types.

Framing the Shed

This is where your 4x4s and 2x4s come into play. You’ll build a rectangular frame for the base, and then erect the walls.

  • Corner posts: Set your pressure-treated 4x4s into the foundation, ensuring they are perfectly plumb (vertical) and level.
  • Wall framing: Attach the 2x4s to the corner posts to create the walls. Use a level constantly to ensure everything is square and plumb.
  • Door and window openings: Carefully cut out openings for your doors and windows, ensuring they are the correct size.
  • Roof framing: This can be a bit more complex, depending on the roof style you choose. A simple gable roof is a good starting point for beginners. You’ll need to build the rafters (sloped beams) and connect them to the top plates of your walls.

Sheathing and Roofing

Once the frame is complete, you can start sheathing the walls and roof.

  • Wall sheathing: Attach your plywood or OSB sheets to the walls, ensuring they are securely fastened.
  • Roof sheathing: Similarly, cover your roof framing with plywood or OSB. This provides a solid base for your roofing material.
  • Roofing: Install your chosen roofing material (asphalt shingles are a good choice for beginners). Make sure to follow the manufacturer's instructions carefully.

Siding, Doors, and Windows

Time to add the finishing touches!

  • Siding: Install your chosen siding material, following the manufacturer’s instructions. This protects your shed from the elements.
  • Doors and windows: Install your pre-hung doors and windows. This is usually easier than building them from scratch.
  • Finishing touches: Add any trim, paint, or sealant to protect your shed and give it a finished look.

Commonly Asked Questions

Q: How long does it take to build a 6x8 shed?

A: This depends on your experience and how much time you can dedicate to it. A beginner might take a couple of weekends, while someone with more experience could probably finish it in a long weekend.

Q: How much does it cost to build a 6x8 shed?

A: The cost varies depending on materials and location. You can expect to spend anywhere from $500 to $2000 or more. Using reclaimed or cheaper materials can significantly reduce the cost.

Q: Do I need a building permit?

A: This depends on your location. Check with your local council or homeowners association before you start building. It's always better to be safe than sorry!

Q: What kind of tools do I need?

A: You'll need basic carpentry tools like a measuring tape, level, saw (circular saw is recommended), drill, hammer, and possibly a nail gun. A comprehensive list is provided earlier in the article.

Q: Can I build this shed alone?

A: It is possible to build it alone, but having a helper, especially for lifting and positioning heavier materials, will make the project significantly easier and faster. Safety is key, and an extra pair of hands will help prevent accidents.

Building your own shed can be a rewarding experience. Remember to take your time, plan carefully, and don’t be afraid to ask for help when needed. Good luck, and happy building!

Read More..

Affordable 6x8 Gable Shed Plans for Budget Builders

Affordable 6x8 Gable Shed Plans for Budget Builders

Affordable 6x8 Gable Shed Plans for Budget Builders

Hey there, fellow DIYers! So you're dreaming of a cute little 6x8 gable shed, but your wallet’s whispering "budget-friendly" a little louder than usual? Don't worry, you're not alone! Building a shed can seem daunting, especially when you're watching the pennies. But with a little planning and some smart choices, building your own affordable 6x8 gable shed is totally within reach. Let's dive into how you can make this dream a reality without breaking the bank.

Planning Your Budget-Friendly 6x8 Gable Shed

Before you even think about hammering a nail, careful planning is your best friend. This is where you'll solidify your vision and create a realistic budget. It might sound boring, but trust me, this step saves headaches (and money!) down the line.

Defining Your Needs and Wants

First things first: what exactly will you use this shed for? Storage? A workshop? A tiny potting shed? Knowing this will determine the features you absolutely need versus the ones you can live without. For example, if you just need storage, you might not need fancy shelving or electrical hookups. Keeping your needs simple helps keep the costs down.

Material Selection: The Smart Shopper's Guide

Choosing the right materials is key to a budget-friendly build. Don’t be afraid to explore options.

  • Pressure-treated lumber: It's more expensive than untreated, but it's crucial for the longevity of your shed, especially the foundation and framing. Investing here saves you from costly repairs later.
  • Reclaimed lumber: If you’re feeling adventurous, consider using reclaimed wood! It can add character and save you some serious cash. Just be sure to check for structural soundness.
  • Plywood: For the walls and roof sheathing, plywood is a cost-effective option. Consider using a lower grade for areas that won’t be visible.
  • Metal roofing: This is usually more expensive initially than asphalt shingles, but it’s incredibly durable and low-maintenance, potentially saving you money in the long run.
  • Shop around! Don’t just settle for the first lumberyard you find. Compare prices at different suppliers, and consider buying in bulk for potential discounts.

Tools: Borrow, Rent, or Buy Wisely

You'll need a selection of tools to build your shed. Before you rush out and buy everything, consider these options:

  • Borrow: Ask friends, family, or neighbors if they have any tools you can borrow. This can save you a significant amount of money.
  • Rent: For specialized tools like a post hole digger or a power planer, renting is often a cheaper alternative to buying.
  • Buy strategically: If you plan on doing more DIY projects in the future, investing in some essential tools might be worthwhile. But prioritize the must-haves for this project first.

Building Your 6x8 Gable Shed: Step-by-Step

Now for the fun part! Here's a simplified overview of the building process. Remember to always consult detailed plans and follow all safety precautions. This is just a general guideline.

Laying the Foundation: The Strong Base

A solid foundation is essential. Consider a simple concrete slab, compacted gravel, or even pressure-treated skids (depending on your soil conditions and budget). Proper leveling is crucial for a stable structure.

Framing: The Shed's Skeleton

This involves building the walls and roof frame according to your plans. Accuracy is key here, so take your time and double-check your measurements. Use appropriate fasteners and ensure all connections are strong and secure.

Sheathing: Covering the Frame

Once the frame is complete, you'll add the plywood sheathing to the walls and roof. This provides a surface for your siding and roofing material.

Roofing: Protection from the Elements

This is where your chosen roofing material comes into play. Follow the manufacturer's instructions for proper installation. Make sure your roof is properly sealed to prevent leaks.

Siding: The Shed's Exterior

Choose your siding material and install it according to the manufacturer's guidelines. This adds both aesthetics and protection to your shed.

Finishing Touches: Doors, Windows, and More

This is where you can add those extra touches that personalize your shed. Install your doors and windows, add any necessary shelving, and consider painting or staining for added protection and a finished look.

Finding Affordable 6x8 Gable Shed Plans

You can find free or inexpensive plans online through various websites and forums dedicated to DIY projects. However, remember that free plans might lack detail or omit crucial information. Consider investing in a low-cost plan from a reputable source to ensure structural integrity and avoid costly mistakes later on.

Tips for Keeping Costs Down

Here are a few more tips to help you stay on budget:

  • Enlist help: Having friends or family help with the construction can significantly reduce labor costs.
  • Reuse and recycle: Repurpose materials whenever possible. For example, old pallets can be used for shelving.
  • Prioritize essential features: Focus on the essential features and leave out non-essential extras for now. You can always add them later.
  • Shop sales and clearance: Keep an eye out for sales and clearance items at your local lumberyards.

Commonly Asked Questions

Q: How long does it take to build a 6x8 gable shed?

A: This varies depending on your experience and the complexity of the plan. Expect to spend several weekends, at minimum.

Q: What permits do I need?

A: Check with your local building department. Permit requirements vary by location.

Q: Can I build this shed by myself?

A: It's possible, but having a helper is highly recommended, especially for lifting heavy materials.

Q: What are the most common mistakes to avoid?

A: Skipping crucial steps (like proper foundation prep), using inadequate materials, and not following plans carefully are common pitfalls.

Q: Where can I find detailed plans?

A: Search online for "6x8 gable shed plans" or visit websites specializing in DIY shed plans. Read reviews before choosing a plan.

Building your own 6x8 gable shed is a rewarding experience. While it requires effort and planning, sticking to a budget and choosing your materials carefully can make it a surprisingly affordable project. So grab those plans, gather your tools, and get ready to build your dream shed!

Read More..

Affordable 6x8 Shed Plans: Build a Shed Without Breaking the Bank

Affordable 6x8 Shed Plans: Build a Shed Without Breaking the Bank

Affordable 6x8 Shed Plans: Build a Shed Without Breaking the Bank

So, you're dreaming of a cute little shed â€" a place to stash your gardening tools, store extra firewood, or maybe even create a tiny, peaceful workspace. But the thought of those hefty shed prices? Yeah, we get it. Building a shed can feel like a major investment. But what if I told you that building a perfectly functional 6x8 shed doesn't have to cost a fortune? Let's dive into how to build your dream shed affordably!

Planning Your Budget-Friendly 6x8 Shed

Before you even think about grabbing a hammer, let's get organized. Planning is key to keeping costs down. This isn't about cutting corners on quality; it's about smart spending.

Setting a Realistic Budget

First things first: Decide on a budget. Be realistic! Consider the cost of materials, tools (do you already own them? If not, factor that in!), and any potential permits. Researching prices beforehand is crucial. You can often find great deals on lumber during off-season months or by checking your local lumber yards for sales or clearance items. A good rule of thumb is to add 10-20% buffer to your initial estimate for unexpected costs.

Choosing Your Materials

This is where you can really save money. Don't feel pressured to use the most expensive materials. Pressure-treated lumber is a great choice for the frame, offering durability and resistance to rot. For siding, consider options like affordable vinyl siding or even repurposed materials if you're feeling creative (just ensure they’re weatherproof!). For roofing, asphalt shingles are a cost-effective and readily available option.

Seeking Out Free or Discounted Materials

Don't underestimate the power of resourcefulness! Check out your local Craigslist, Facebook Marketplace, or even neighborhood recycling centers for free or discounted materials. You might be surprised at what treasures you can find! People often give away perfectly usable lumber or other building materials.

Finding Free or Affordable Shed Plans

You don't need to pay for fancy shed plans. There are tons of free resources available online. A quick search for "free 6x8 shed plans" will yield many results. Look for plans that are detailed and easy to follow, with clear diagrams and material lists. Remember to always double-check measurements and make adjustments as needed to suit your specific needs and the materials you have available.

Modifying Existing Plans

Don't be afraid to modify plans to better fit your budget and skill level. For example, if a plan calls for complex roof trusses, consider a simpler gable roof design. Minor adjustments can make a big difference in the overall project cost and complexity.

Using Simple Designs

Keep the design simple. A basic rectangular shed with a gable roof is not only easy to build but also requires fewer materials. Avoid intricate details or complex architectural features that will add to both the cost and the complexity of construction.

Gathering Your Tools

Before you start building, make a list of the tools you'll need. Borrowing tools from friends, family, or your local library can significantly reduce costs. Many home improvement stores also offer tool rental services. For a 6x8 shed, you'll likely need:

  • Measuring tape
  • Level
  • Hammer
  • Saw (circular saw or hand saw)
  • Drill
  • Screwdriver bits
  • Shovel (for digging post holes, if applicable)
  • Post hole digger (optional, but helpful)
  • Safety glasses and work gloves

Step-by-Step Construction Guide (Simplified)

This is a very general overview. Always refer to your chosen plans for detailed instructions. Remember safety first! Always wear appropriate safety gear.

Foundation

A simple concrete slab is ideal for a 6x8 shed but can be expensive. Consider using pressure-treated 4x4s set in concrete footings as a more affordable alternative. This will create a sturdy base for your shed.

Framing

Construct the floor frame using pressure-treated lumber. Then, build the wall frames, ensuring they are square and plumb. Assemble the roof trusses (or rafters for a simpler design) and attach them to the wall frames.

Siding and Roofing

Once the framing is complete, you can add your chosen siding and roofing materials. Work carefully and methodically, ensuring everything is properly aligned and secured.

Finishing Touches

Add a door, windows (if desired), and any other features you've planned for your shed. A little paint or stain can go a long way in adding curb appeal and protecting your shed from the elements.

Tips for Keeping Costs Down During Construction

  • Work with a friend or family member: Sharing the labor can significantly reduce the time (and therefore, potential labor costs if you hire someone) required to complete the project.
  • Take your time: Don't rush the process. Working slowly and carefully will help avoid mistakes that could lead to wasted materials and extra costs.
  • Reuse and recycle: Look for ways to repurpose materials whenever possible. This could include using old pallets for fencing or repurposing scrap wood for smaller components.
  • Shop around: Compare prices from different lumberyards and home improvement stores before purchasing materials.
  • Check for sales and discounts: Many lumberyards and home improvement stores offer sales and discounts on building materials throughout the year. Plan your project around these opportunities to save money.

Frequently Asked Questions (FAQs)

Q: Do I need a permit to build a 6x8 shed?

A: Permit requirements vary by location. Check with your local building department to determine whether a permit is required for your project. It's always better to be safe than sorry and get the necessary permits beforehand.

Q: How long does it take to build a 6x8 shed?

A: The construction time depends on your experience level and the complexity of your chosen plans. Expect it to take anywhere from a weekend to several weeks. If you're working on it in your spare time after work or on weekends, it may take longer.

Q: What if I don't have any experience building?

A: Building a shed is a great learning experience! Start with a simple design and take your time. There are countless online resources, videos, and tutorials available to guide you. Don’t be afraid to ask for help from more experienced builders.

Q: Can I save money by building the shed myself instead of hiring a contractor?

A: Absolutely! Building your own shed can save you a significant amount of money compared to hiring a contractor. However, factor in the time commitment and potential costs of renting or buying tools.

Q: What is the best type of wood for a shed?

A: Pressure-treated lumber is an excellent choice for its durability and resistance to rot. However, other types of wood can also be used, depending on your budget and climate. Always ensure the wood is properly treated to withstand the elements.

Building a 6x8 shed doesn't have to be a daunting or expensive project. With careful planning, resourcefulness, and a little elbow grease, you can create a functional and beautiful shed without breaking the bank. Happy building!

Read More..

6x8 Shed Plans and Cost Analysis for Budget-Conscious Builders

6x8 Shed Plans and Cost Analysis for Budget-Conscious Builders

6x8 Shed Plans and Cost Analysis for Budget-Conscious Builders

Constructing a 6x8 shed offers a practical and cost-effective solution for various storage needs. This comprehensive guide provides detailed plans and a thorough cost analysis, empowering budget-conscious builders to undertake this project confidently. We will explore material selection, construction techniques, and potential cost-saving strategies to ensure a successful and affordable build.

I. Shed Design and Planning

Before commencing construction, meticulous planning is paramount. This section outlines the crucial design considerations for a 6x8 shed, emphasizing simplicity and cost-effectiveness.

A. Foundation Considerations

The foundation forms the bedrock of your shed's stability. For a 6x8 structure, a simple, cost-effective approach is often sufficient. Options include:

  • Gravel Base: A layer of compacted gravel provides adequate drainage and leveling for a shed of this size. This is the most budget-friendly option.
  • Concrete Slab: While more expensive, a concrete slab offers superior durability and longevity. Consider this option if your budget allows and you anticipate heavier storage items.
  • Concrete Piers: This method involves setting concrete piers at each corner and along the perimeter. This offers a good balance between cost and stability.

The chosen foundation will significantly impact the overall cost, so careful consideration is essential.

B. Material Selection: Prioritizing Affordability

Optimizing material selection is critical for budget-conscious building. Choosing readily available and cost-effective materials is key. Here's a suggested material list:

  • Pressure-Treated Lumber: Opt for pressure-treated lumber for the floor joists, sill plates, and wall studs to ensure rot resistance. Consider purchasing lumber from a local lumberyard or salvage supplier for potential cost savings.
  • Plywood Sheathing: Plywood sheathing provides a strong and relatively inexpensive exterior covering for the walls and roof. Standard 1/2-inch plywood is usually sufficient.
  • Asphalt Shingles: Asphalt shingles are a widely accessible and affordable roofing material. Consider purchasing them during off-season sales for additional savings.
  • Exterior-Grade Paint or Stain (Optional): Painting or staining the exterior enhances durability and aesthetic appeal. This step can be postponed if budget is extremely tight.
  • Hardware: Ensure you have sufficient screws, nails, and other necessary hardware. Buying in bulk often yields cost savings.

C. Shed Design: Simplicity is Key

A simple, rectangular design minimizes material usage and construction complexity. Avoid intricate architectural features that increase both cost and labor. A gable roof is a cost-effective and practical option.

II. Detailed Construction Steps

This section outlines the step-by-step construction process for a 6x8 shed. Adhering to these guidelines will ensure a structurally sound and durable structure.

A. Foundation Preparation and Installation

Begin by preparing the chosen foundation. This might involve excavating for a gravel base, forming a concrete slab, or digging holes for concrete piers. Ensure the foundation is level and provides adequate drainage.

B. Floor Framing and Construction

Construct the floor frame using pressure-treated lumber for joists. Space the joists appropriately to support the intended load. Install plywood sheathing for a solid and level floor.

C. Wall Framing and Erection

Construct the wall frames using pressure-treated lumber for the sill plates and studs. Ensure proper spacing and bracing for structural integrity. Erect the walls and secure them to the floor frame.

D. Roof Framing and Installation

Construct the roof trusses or rafters, again using pressure-treated lumber. Install the roof sheathing and apply asphalt shingles. Ensure proper overhang to protect the walls from rain.

E. Exterior Sheathing and Finishing

Apply the exterior plywood sheathing to the walls. Caulk all gaps and cracks to prevent moisture penetration. Apply exterior paint or stain (optional) for weather protection and aesthetics.

F. Door and Window Installation (Optional)

If desired, install a door and/or window. Ensure proper framing and sealing to maintain weather resistance.

III. Cost Analysis: Minimizing Expenses

This section provides a detailed cost breakdown for building a 6x8 shed, outlining strategies for minimizing expenses.

A. Material Costs

A detailed breakdown of material costs should be created based on local pricing. Consider obtaining multiple quotes from different suppliers to secure the best prices. Include costs for lumber, plywood, roofing materials, hardware, and any optional features such as doors and windows.

B. Labor Costs

If you are undertaking the construction yourself, labor costs are minimized. However, factor in any potential costs for renting tools or equipment that you may not own. If you plan to hire a contractor, obtain multiple bids to compare pricing.

C. Permitting Fees (If Applicable)

Check with your local authorities regarding any necessary building permits. These fees can vary significantly depending on location and regulations.

D. Contingency Fund

Always include a contingency fund to account for unforeseen expenses. This could include unexpected material costs, tool repairs, or additional labor.

E. Cost-Saving Strategies

  • Source materials from multiple suppliers: Compare prices and look for sales or discounts.
  • Purchase materials in bulk: This often results in significant cost savings.
  • Utilize reclaimed or salvaged materials: This can drastically reduce material costs.
  • Perform as much of the work yourself as possible: This significantly reduces labor costs.
  • Seek assistance from friends or family: This can help expedite construction and reduce labor costs.

IV. Conclusion

Building a 6x8 shed can be a rewarding and cost-effective project for budget-conscious individuals. By carefully planning, selecting affordable materials, and following these detailed steps, you can construct a durable and functional storage solution without exceeding your budget. Remember to prioritize safety throughout the construction process and adhere to all local building codes and regulations. With careful planning and execution, you can achieve your shed-building goals while staying within your financial constraints.

Read More..

DIY-Friendly 6x8 Lean To Shed Plans for All Skill Levels

DIY-Friendly 6x8 Lean To Shed Plans for All Skill Levels

DIY-Friendly 6x8 Lean-To Shed Plans for All Skill Levels

Hey there, fellow DIY enthusiasts! So you're dreaming of a brand new 6x8 lean-to shed, huh? Fantastic! Whether you're a seasoned pro with a workshop full of tools or a newbie just starting out, this guide is going to walk you through building your own lean-to shed. We'll cover everything from planning and materials to construction, ensuring it's a manageable project, no matter your skill level. Let's get started!

Planning Your 6x8 Lean-To Shed

Before you even think about grabbing a hammer, careful planning is key. This phase might seem tedious, but trust me, it'll save you headaches (and potentially money) down the line. We'll break it down into manageable steps.

Choosing Your Location

Where will your new shed live? Consider these factors:

  • Proximity to your house: A lean-to shed is, by definition, attached to an existing structure. Make sure you have a suitable wall of your house or garage. Consider drainage â€" you don’t want water pooling against your house.
  • Sunlight and shade: Do you need a sunny spot for growing plants or a shadier area for storing sensitive items?
  • Accessibility: Will you need easy access with a vehicle to unload materials, or is it purely for hand-carried items?
  • Local building codes: Check with your local authority for any permits or regulations regarding shed construction. This is super important to avoid future problems!

Designing Your Shed

Now for the fun part! Think about what you'll use your shed for. This will influence design choices. Will it be a storage shed for garden tools, a workshop, or something else entirely?

  • Door placement: Consider the best location for a door, ensuring easy access and enough clearance for opening.
  • Window placement: Windows add natural light and ventilation. Decide if you need any and where they’d be most beneficial.
  • Shelving and Workbenches: If you’re planning on using the shed as a workshop, plan for built-in storage solutions right from the start.
  • Roof Style: A simple single-slope roof is typical for lean-to sheds, making it easy to construct.

Gathering Materials

Creating a detailed materials list is crucial to avoid mid-project trips to the hardware store. This list will vary based on your specific design, but here’s a general overview:

  • Pressure-treated lumber: For the frame, this resists rot and insects.
  • Plywood or OSB sheeting: For the walls and roof.
  • Roofing material: Asphalt shingles, metal roofing, or even recycled plastic roofing are all options.
  • Fasteners: Nails, screws, and possibly lag bolts.
  • Other: Flashing for the roof, house wrap (optional but recommended), paint or sealant (optional).

It's wise to get extra materials; you never know when a miscut or accidental damage might occur. It’s always better to have a little extra than to be short!

Constructing Your 6x8 Lean-To Shed

Now for the exciting part: building! Remember safety first! Always wear safety glasses and appropriate work gloves. Take your time and double-check your measurements.

Foundation and Framing

Start by preparing a level base. This could be a concrete slab, compacted gravel, or even a well-prepared earth base. Your choice depends on your budget and soil conditions. Once your base is ready, you'll construct the frame using your pressure-treated lumber. Begin with the base frame, then add the vertical supports for the walls. Accuracy is key here â€" square and plumb frames make for a better-looking and more functional shed.

Wall Construction

Attach your plywood or OSB sheeting to the frame. Ensure proper spacing between sheets for expansion and contraction. Now is the time to add any windows or doors. Precise cuts and proper installation are vital for a professional finish. You can also add insulation if you plan on using the shed in colder climates.

Roof Construction

The roof is the most critical part structurally. Build the roof frame following your design. For a lean-to shed, it's usually a simple rafter system attached to the house wall and the main frame. Add your chosen roofing material, ensuring proper overlap to prevent leaks. Flashing is crucial where the roof meets the house wall.

Finishing Touches

Once the structure is complete, add any finishing touches. This could include painting the exterior, adding shelving, or installing a workbench. A little bit of extra effort here can really enhance the overall look and functionality of your shed. Consider adding trim to the edges for a more polished look.

Tips for Different Skill Levels

This project is adaptable to different skill levels. Here are some pointers:

Beginner

Start with a simple design. Focus on accuracy with your measurements and cuts. Don’t be afraid to ask for help from more experienced friends or family. Take your time and celebrate small victories along the way!

Intermediate

You can tackle a more complex design, incorporating features like windows, shelving, or a more elaborate roofline. Consider using power tools to speed up the construction process. Remember, careful planning is still key to success.

Advanced

Let your creativity flow! Design your dream shed, incorporating complex features and advanced techniques. Explore different roofing materials and consider adding specialized features like electricity or climate control.

Commonly Asked Questions

Here are some questions people frequently ask about building a lean-to shed:

  • Q: Do I need a building permit? A: It depends on your local regulations. Check with your local building department before you start.
  • Q: What kind of foundation is best? A: A concrete slab is ideal, but a gravel base or even a well-prepared earth base can work, depending on the ground conditions.
  • Q: How long does it take to build? A: This varies greatly depending on the complexity of the design and your skill level. A simple shed can be built in a weekend, while a more complex one might take several weekends.
  • Q: What tools do I need? A: Basic hand tools are sufficient for a simple shed, but power tools (like a circular saw and drill) will speed up the process. A level is essential!
  • Q: How much does it cost? A: Costs vary widely depending on material choices and design complexity. You can build a basic shed for a few hundred dollars, while more elaborate designs can cost considerably more.
  • Q: Can I build this myself, even if I’m not handy? A: Absolutely! Start with a simple design, take your time, and don’t hesitate to ask for help. There are plenty of resources available online to guide you through each step.

I hope this guide has inspired you to take on this rewarding project! Remember, the most important thing is to have fun and enjoy the process of building your very own 6x8 lean-to shed. Happy building!

Read More..

Saturday, November 16, 2024

12x20 Shed Plans with Loft: DIY Instructions for Outdoor Projects

12x20 Shed Plans with Loft: DIY Instructions for Outdoor Projects

12x20 Shed Plans with Loft: DIY Instructions for Outdoor Projects

This comprehensive guide provides detailed instructions for constructing a 12x20 shed with a loft, a project ideal for experienced DIY enthusiasts. The project requires meticulous planning, precise execution, and a commitment to safety. This guide outlines each stage, from initial planning and material acquisition to final finishing touches. Improper construction can lead to structural instability and safety hazards; therefore, adherence to building codes and safe practices is paramount.

Phase 1: Planning and Preparation

Before commencing construction, thorough planning is crucial. This phase involves several key steps:

Site Selection and Preparation

Site Selection: Choose a level, well-drained location with easy access for material delivery and future maintenance. Consider proximity to utilities and potential obstructions like trees or underground services. Ensure compliance with local zoning regulations regarding setbacks and building permits.

Site Preparation: Clear the chosen area of vegetation, debris, and rocks. Level the ground using a shovel and leveler. For uneven terrain, consider excavating and compacting the soil or using a concrete slab foundation. Mark the perimeter of the shed using stakes and string to ensure accurate placement.

Permitting and Regulations

Check Local Codes: Contact your local building department to ascertain necessary permits, inspections, and adherence to local building codes. These regulations vary by location and may include requirements regarding foundation type, structural integrity, and electrical work.

Obtain Permits: Submit the required applications and plans to the building department. Obtain all necessary permits before initiating construction. Delays in obtaining permits can significantly prolong the project timeline.

Material Acquisition and Cost Estimation

Detailed Material List: Create a comprehensive list of materials, including lumber (pressure-treated for ground contact), roofing materials, fasteners, concrete (if using a concrete foundation), plywood for sheathing, and insulation. Specify quantities based on the detailed plans.

Cost Estimation: Develop a detailed budget encompassing all materials, tools (rentals or purchases), and potential unforeseen expenses. Comparing prices from various suppliers can significantly impact the overall project cost.

Phase 2: Foundation Construction

The foundation provides stability and longevity for your shed. Several options exist, each with its own advantages and disadvantages:

Concrete Slab Foundation

Excavation: Excavate the area to the required depth, typically 4-6 inches, ensuring a level base. Add gravel for drainage and compaction.

Formwork: Construct formwork using treated lumber to contain the concrete. Ensure the formwork is level and plumb.

Concrete Pour: Pour and level the concrete, ensuring proper compaction to prevent cracking. Allow sufficient curing time before proceeding to the next phase.

Gravel Base Foundation

Grading and Compaction: Level the ground and compact the soil thoroughly. This ensures stability and prevents settling.

Gravel Layer: Apply a layer of compacted gravel to create a level base for the shed's framing.

Weed Barrier: Lay a weed barrier over the gravel to prevent weed growth beneath the shed.

Phase 3: Framing and Sheathing

This phase involves constructing the shed's frame and covering it with sheathing.

Floor Framing

Joist Installation: Install pressure-treated floor joists, spaced according to building code requirements (typically 16 inches on center). Ensure proper leveling and support.

Subflooring: Install plywood subflooring over the joists, ensuring proper fastening and alignment.

Wall Framing

Wall Assembly: Construct wall frames using pre-cut lumber, following the dimensions specified in the plans. Use appropriate bracing to ensure structural integrity.

Wall Erection: Erect the wall frames, ensuring plumbness and alignment. Use temporary bracing to maintain stability during construction.

Sheathing: Cover the exterior walls with plywood sheathing, ensuring proper fastening and alignment.

Roof Framing

Rafter Installation: Install roof rafters, ensuring proper spacing and pitch. Use appropriate bracing to support the roof structure.

Roof Sheathing: Install roof sheathing over the rafters, ensuring proper fastening and alignment.

Phase 4: Roofing and Exterior Finishing

This phase focuses on completing the roof and exterior finishing.

Roof Covering

Underlayment: Install roofing underlayment to protect the sheathing from moisture.

Shingle Installation: Install asphalt shingles or other chosen roofing material, following the manufacturer's instructions.

Exterior Siding and Trim

Siding Installation: Install vinyl, wood, or metal siding, ensuring proper alignment and fastening.

Trim Installation: Install trim around windows, doors, and other exterior features.

Phase 5: Loft Construction and Interior Finishing

This phase involves constructing the loft and completing interior finishing.

Loft Framing and Flooring

Framing: Construct the loft framing, ensuring proper support and load-bearing capacity.

Flooring: Install plywood flooring for the loft, ensuring stability and a level surface.

Interior Walls and Finishing

Wall Installation: Install interior walls, if desired, ensuring proper alignment and fastening.

Finishing: Install insulation, drywall, paint, and other interior finishes.

Phase 6: Doors, Windows, and Final Touches

The final phase focuses on installing doors and windows, and completing any remaining details.

Door and Window Installation

Door Installation: Install exterior and interior doors, ensuring proper alignment and functionality.

Window Installation: Install windows, ensuring proper sealing and weatherproofing.

Final Touches and Cleanup

Cleanup: Remove all debris and construction materials from the site.

Final Inspection: Schedule a final inspection with the building department to ensure compliance with building codes.

Note: This guide provides a general overview. Always consult detailed plans specific to your chosen shed design. Seek professional assistance if needed, particularly for tasks requiring specialized skills or equipment. Safety should always be prioritized throughout the construction process.

Read More..
 
Amado Vizzi - Powered By Blogger